
Homemade pizza is always a hit at our house, and today I'll show you how easy it is with this soaked flour recipe for the crust. Why ‘soak your grains'? Because it's one way to break down some of the mineral-blocking phytic acid that's found in whole grains, so we're better able to absorb and utilize all the life-giving minerals in our foods.
(Hint: Even better than the regular whole wheat that I used back when this video was filmed, now I mostly use Spelt or Einkorn, both more traditional types of wheat that are often better tolerated in those who are sensitive to conventional wheat. Click here for where to buy Spelt and/or Einkorn. And at this link you can even find sprouted Einkorn flour – sprouted grains are already soaked, so you can just use them as-is!)
Homemade Pizza with Soaked Crust
So this pizza recipe isn't exactly in the “fast” real food category, but it doesn't take too long. I'd call it “medium” in length, and it's really simple. The best part is… Who doesn't love pizza? And it's all homemade so there's nothing gross or unknown in there like the frozen ones from the store or the pizza chains.
By the way, you'll have to let me know if you like the “real” factor in my videos: cluttered drawings on the frig, doorbell ringing, and a frantic “NOT TOMATOES!” yell at the end of the video when our then 4 year old saw what I put on the pizza. I'd like to say that if you do NOT care for that format, I could try to be more professional for you, but I don't know if I could pull that off!
Watch the video here, it'll play after the ad:
Homemade Pizza with Soaked Crust Recipe
Ingredients and Instructions:
Note: Each batch makes 2 thick, 3 medium or 4 thin 16” crust pizza crusts. I use mostly organic ingredients, as much as possible.
Start the night before by mixing together the following (I use my Beloved Bosch Mixer but you could do it by hand, it will just take a lot more elbow grease the next day when kneading):
- 2 cups whole grain flour (Find Spelt or Einkorn here)
- 3/4 cup whey + 1 1/4 cups warm water (Other soaking options: 4 Tablespoons lemon juice or vinegar + 2 cups warm water OR 1 cup yogurt or buttermilk + 1 cup warm water.)
Let set overnight or at least 7 hours to break down the phytic acid in the grains.
Mix in the following the next day right in the Bosch (In the morning OR about a couple hours before you want to eat):
- 3 cups unbleached white flour
- 2 teaspoons yeast
- 1/4 cup soft butter
- 1/8 cup molasses (Find molasses here)
- 1/4 cup raw honey (If you don't have a good local source for raw honey, you can find it here.)
- Add last: 1 teaspoon sea salt (Find quality sea salt here)
Knead until it pulls away from the sides. If it seems too wet, add a little more unbleached white flour. If it feels dry, add a little bit of warm water.
Note: At this point you could freeze your ball of dough to use later!
Grease your pizza pans (I love my big stainless steel pizza pans) with butter or olive oil (find healthy fats here). If you don’t have a pizza pan, a cookie sheet works, too, just adjust the dough depending on how thick you like your crust.
Also depending on how thick you want your crust and how many pizzas you’re making from that batch (see above for how many crusts each batch makes), take out the amount of dough needed and spread to the edges as shown in the video. Prick around the crust with a fork. Note: You could also freeze at this point for a fast-food dinner some night. Just take it out of the freezer, let thaw for an hour or so, and continue the recipe…
Partially bake the crust before adding toppings: 10 minutes at 350*.
Add toppings of your choice. I use organic pizza sauce from the store or this easy recipe for homemade pizza sauce.
Note: As shown in the video, sometimes I like to make different kinds of pizzas, such as one ‘meat lovers’, one with just cheese for the kids, and maybe one without sauce: I’ll brush garlic butter on the crust, add a bunch of veggies and all different cheeses – feta cheese is delicious!
Another note: You could also freeze at this point for a really fast-food dinner some night. You’d need to allow more time for it to thaw if it already has the toppings on, but then you only need to bake and you’re done! (You could also get it out of the freezer the night before and put it in the fridge, then just bake at dinnertime.) You’ll love yourself for having some of these in the freezer for crazy busy days!
Finish baking until toppings are hot and edges are golden brown. Enjoy!
- By the way, you could make Calzones with this dough, too. Just flatten a piece of dough about the size of your hand, add fillings of your choice (we like ham and a couple different kinds of cheeses), fold one side over on top of the other and push the edges together to seal with your fingertips. Brush with garlic butter, bake 'til golden brown and then serve with more garlic butter dipping sauce. YUM!
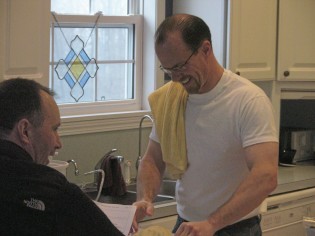
- Check out the time when my Hubs, Kent, made two different kinds of pizzas!

Melinda says
Do you think this would stil work without molasses or with a substitute?
KitchenKop says
Yes I do! Here’s another post with both types of recipes, one with and one without molasses:
https://kellythekitchenkop.com/easy-recipe-homemade-pizza/
Kelly
Lois says
Hi Kelly I have a question, I was wondering about the gluten portion of the white unbleached? Wouldn’t soaking it break down the gluten or is it not very effective since it isn’t fresh flour? I’m alittle confused because the focus is phytic acid and there is still lots of gluten in the white portion of the flour.
KitchenKop says
Hi Lois,
Soaking helps decrease the amount of phytic acid in *whole* grains (white flour doesn’t have phytic acid), but it doesn’t break down gluten from what I understand.
Check this out about gluten and sourdough, though: https://www.thehealthyhomeeconomist.com/can-celiacs-eat-true-sourdough-bread/
Kelly
Sandy says
Love the video, and loved the “homey” feeling! None of us cook in studios, so why should you? Unless you prefer having no distractions! Thanks for sharing your knowledge to encourage us all to eat healthy.
ValerieH says
the last 3 cups of flour aren’t soaked, right?
KitchenKop says
Right because those are just unbleached white, there’s no phytic acid in white flour.
Kelly
Maureen Palumbo says
I also like the homey “real’ tone of the video with the children in and out and their comments. Good focus throughout, Mom.
Leah G says
I have been making Jenny @ Nourished Kitchen’s sourdough pizza crust and we really like it I think your crusts look far better than mine. Def going to try this on the next batch.we’re actually having pizza right now with our homemade mozzarella.
KitchenKop says
Homemade mozz, impressive!!
Thanks for the feedback Patty & Betsy! 🙂
Kel
Patty J. says
I enjoyed the “real” kitchen and child for the video. It means I can do this, too. There is plenty of so-called professional, sterile looking cooking videos out there. I like the regular mom just doing her thing with real life occurring. I’m looking forward to trying out this recipe!
Betsy says
Kelly, I loved the video – interruptions and all. I think you did a great job staying on course.
I swear we have the same range and microwave, and could be the same refrigerator! Right down to the “stuff” all over it, lol.
Laura West Kong says
Looks delish! I might have to adapt it for gluten-free flours. One question: when I soak nuts, whole grains, seeds and legumes, I always rinse them well. I never use the soaking water. I haven’t ventured into soaking flour. When you soak but don’t rinse, what happens to the phytic acid and other things we’re trying to get rid of? Is some of it still floating in the rinse water, is it deactivated, does it simply disappear? Can you elaborate? (Well, I guess that was 3 questions…but it’s all the same general issue)
KitchenKop says
Good question!
Here’s what Jenny from Nourished Kitchen says about that:
“I’ve been soaking grains, but do I need to rinse them prior to cooking?
Not necessarily. Soaking grains degrades phytic acid, meaning that your soaking water should not contain an overly large amount of phytates. If you’ve soaked your grains overnight in an acidic solution to help mitigate the effects of phytic acid, an anti-nutrient which binds up minerals preventing your body from fully absorbing them, you do not need to discard the soaking liquid or rinse your grains.”
She goes on to say that if you *can* rinse your grains (such as with whole grains, beans and legumes), then you might want to, though, because it improves their taste.”
Read more here: https://nourishedkitchen.com/soaking-grains-nuts-legumes/
Laura West Kong says
Thanks!