Marshmallow Dessert Recipes with Health Benefits
Don't you love it when you find out how to take a “junk food” and make it yourself so it has actual health benefits?! Yes, there is sugar in these, so it's not like they're a health food or anything, but they DO have some redeeming qualities. 🙂
Here's what makes these somewhat good for you:
 The beef gelatin used in these recipes is made from pastured animals and contains collagen. Collagen is a protein and a building block for our skin, and is protective against signs of aging by preserving elasticity and regeneration. It also supports bone and joint health and muscle restoration (so athletes love it), and can even help to manage your weight and boost your metabolism! (Get beef gelatin from pastured animals here and get this book for more gelatin recipes here: The Gelatin Secret.)
Besides that, these recipes have all real food ingredients, unlike these scary ingredients on store-bought marshmallows:
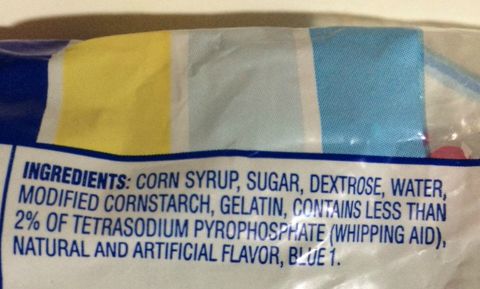
UPDATE: Now they do have some more natural marshmallows that I actually found at my store if you just don't think you'll make them!
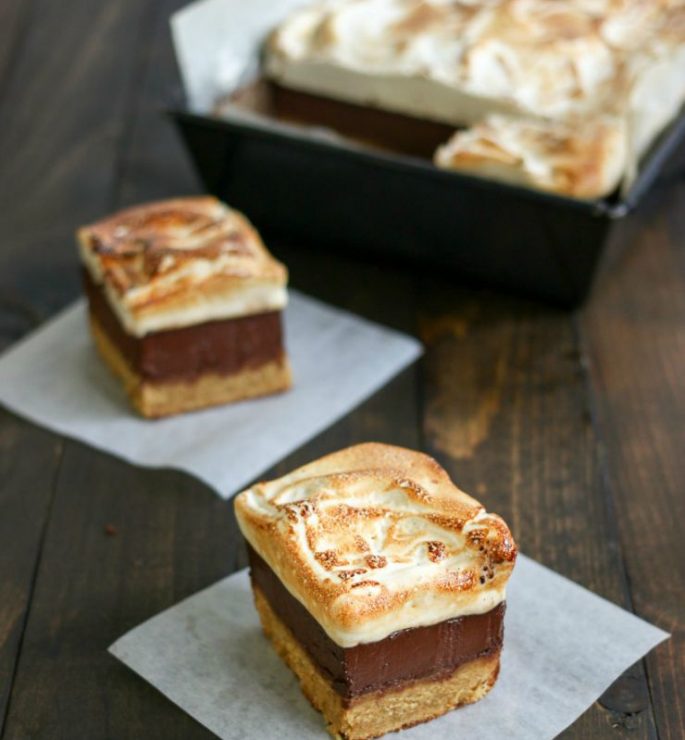
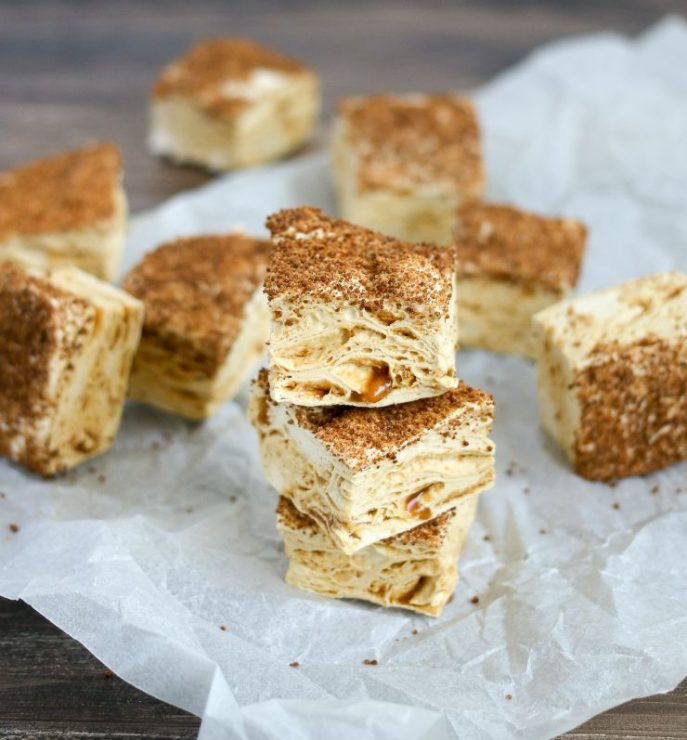
Note: I made the sea salt caramel marshmallows, but have not tried the smores bars yet — don't they look scrumptious?! I was skeptical at how the marshmallows would come out, I've never made them before, but they were better than any I've ever had, maybe because these were sea salt caramel marshmallows! Hint: They're not as good the second day (still tasty, but not as fluffy and wonderful), so eat and share them fresh if possible.
Trust me, it's quite possible.
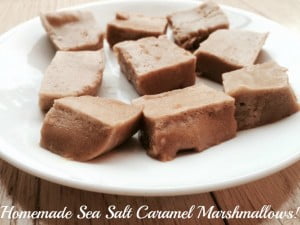
Homemade Sea Salt Caramel Marshmallows
Ingredients
- ½ cup filtered water
- 2 Tablespoons gelatin
- 1 cup honey or maple syrup I use maple syrup
- 2 Tablespoons coconut cream from the top of a refrigerated can of full-fat coconut milk or heavy cream, I use heavy cream.
- ½ teaspoon sea salt
- 1 Tablespoon pastured butter ghee, or coconut oil (plus more for greasing the pan), I use butter
- 2 teaspoons vanilla extract
- Tapioca flour for dusting or organic powdered sugar
- Optional for garnish: coconut palm sugar
Instructions
- Note: this recipe has a few technical steps so be sure to read through the instructions fully and have all your ingredients ready before beginning.
- Add the water and gelatin to the bowl of a stand mixer fitted with the whisk attachment. Mix briefly and leave it to bloom for at least 3-5 minutes. Grease a deep pan approximately the shape of a standard bread loaf pan (wider pans work but will yield thinner marshmallows). After greasing, dust the inside completely with a light coating of tapioca flour. Set the pan aside.
- Add the honey or maple syrup to a small saucepan and heat over low heat. Cook at a low simmer until it has reduced by half and turned a dark golden (but not burnt) color. It will read about 280-300*F on a candy thermometer. (I only went to 260* because I was afraid it was going to burn! I think that's why mine weren't as fluffy, though, see pictures below.)
- With the stand mixer running on low speed, carefully drizzle the ¾ of the hot syrup over the bloomed gelatin. You want to leave about 2-3 tablespoons syrup in the pan — eyeballing is ok, there is no need to be exact. Turn the mixer to medium speed and mix until the gelatin is melted, about 2 minutes. Then turn the mixer to high speed for about 5 minutes, or until the mixture has doubled in volume and turned an off-white color.
- While the syrup is mixing, make the caramel by adding the cream to the remaining syrup left in the pan. Swirl the pan gently to incorporate the cream. Place the pan over medium heat and cook until the syrup returns to a dark caramel color and about 300* again on a candy thermometer (this happens quickly). Turn the heat off and stir in the sea salt and butter.
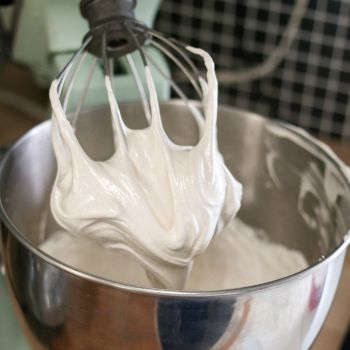
- Once the marshmallow is whipped and no longer feels hot to the touch, stop the mixer and add the vanilla extract. Turn the mixer back to high speed and whip to incorporate, about 1 minute. You know the marshmallow is ready when it holds a shape when you lift the whisk up from the bowl (like shown here).
- Remove the bowl from the stand mixer and drizzle the salted caramel in. With a large spatula, gently mix the caramel in with just a few strokes. Pour the marshmallow mix into the prepared pan and set it aside for 2-4 hours to set up. It’s ready when it feels firm to the touch and the entire sheet of marshmallow can be lifted easily from the pan.
- Dump the finished marshmallows out onto a surface coated with a bit of tapioca starch. Cut into squares using a greased knife or rolling pizza cutter. Dust the sides with coconut palm sugar, as desired, or simply use more tapioca starch to keep them from sticking together. Store in a sealed container at room temperature for up to 2 weeks.
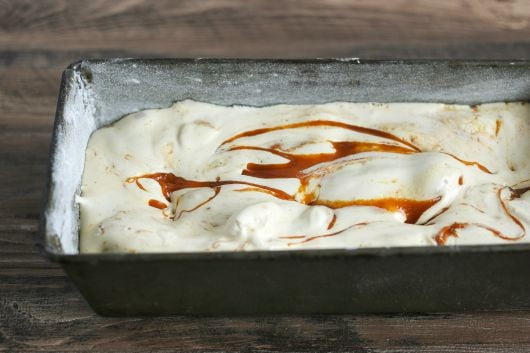
Here's how the original recipe looked:
Here's how mine looked, not quite as pretty, LOL.


Indoor Smores Bars (paleo, gluten free, dairy free)
Ingredients
For the crust:
- 2 ½ cup blanched almond flour
- 2 Tablespoons blackstrap molasses
- 2 Tablespoons maple syrup or raw honey
- 1 teaspoon sea salt
For the chocolate layer:
- 3 cup dark chocolate chips
- ½ cup full-fat milk of choice read about healthy milk choices here
- ¼ cup coconut oil
- 1 teaspoon vanilla extract
For the marshmallow layer:
- 1 cup maple syrup or raw honey
- Pinch sea salt
- ½ cup filtered water
- 2 Tablespoons beef gelatin
- 1 teaspoon vanilla extract
Instructions
- Preheat the oven to 350*F.
- In the bowl of a large food processor, combine the Crust Layer ingredients. Process until combined and sticky looking. Scrape down the bowl between mixing, as needed. Dump the dough into a 9×9″ baking pan (9×13″ works for thinner layers) lined with parchment. Placing 2 long pieces into the pan, as shown above, helps with removal later. Press the crust flat and prick with a fork about 10 times throughout the crust. Bake for 10-12 minutes, or until lightly golden.
- While the crust is cooking, prepare the Chocolate Layer by heating the milk, coconut oil, and vanilla extract in a small saucepan over medium heat. Once melted, remove from the heat and add the chocolate chips. Allow it to sit for 3 minutes to let the chocolate melt, then whisk gently until the mix is smooth. Pour over the cooked crust and move the pan to the refrigerator to cool, about 30 minutes.
- About 15 minutes before removing the pan from the refrigerator, prepare the Marshmallow Layer by placing the 1 cup of maple syrup or raw honey with a pinch of sea salt into a small saucepan. Bring to a simmer over medium heat and cook until the syrup is reduce by about half (it will read approximately 260-280*F on a candy thermometer).
- While the syrup is cooking, pour the ½ cup filtered water into the bowl of a stand mixer fitted with the whisk attachment. Sprinkle the beef gelatin over the water and let stand 5 minutes to bloom. Turn the mixer on low and drizzle the hot reduced syrup into the side of the bowl. Once mixed into the gelatin, turn the speed to medium for 60 seconds. Then move the speed to high and whip for 2-3 minutes, or until the mixture has turned white and forms thick ribbons when the whisk is lifted out. Add the vanilla extract and whisk again to incorporate.
- Scoop the marshmallow on top of the cooled Chocolate Layer and spread out. Allow to set up at room temperature for a minimum 2 hours before serving (you can serve before this if you don’t mind gooey layers). Brown the top with a kitchen blowtorch or by placing the pan under the broiler in the over with the pan on the lowest rack for 1-2 minutes. Watch it closely because it will burn fast!
- Serve immediately after browning and cut with a knife dipped in hot water for easier slicing. Best stored in the refrigerator, keep leftovers for up to 1 week.
Okay readers, let me know what you think!
- Get this e-book for more: The Gelatin Secret.
- Get beef gelatin from pastured animals here.

Peggy Swank says
I mAde these from the last time you posted, and glad I did and glad you shared again to remind me to make again. The family liked them almost as much as I did
sharing411 says
This looks yummy! How long did it take you to make it?
KitchenKop says
Remember as I said in the post, I’ve made the marshmallows, but not the smores, and I’d say it took about 30 minutes or so. Worth it! 🙂